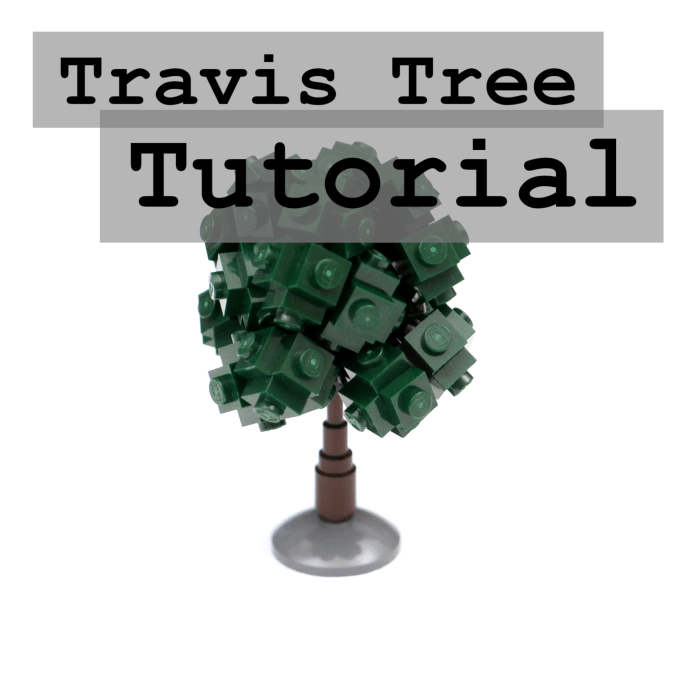
A tutorial showing how to make a tree made mostly out of travis bricks and 1×1 plates in your colour of choice (I went with dark green). It’s quite simple but still has a rather organic shape to it. There is a bit of a pattern in it, but this can be fixed by alternating the angles of the bricks on different sides.
The design can also double up as a bush in minifig scale and could be extended higher with more layers if you want to build something taller.
Here’s a list of what we need:
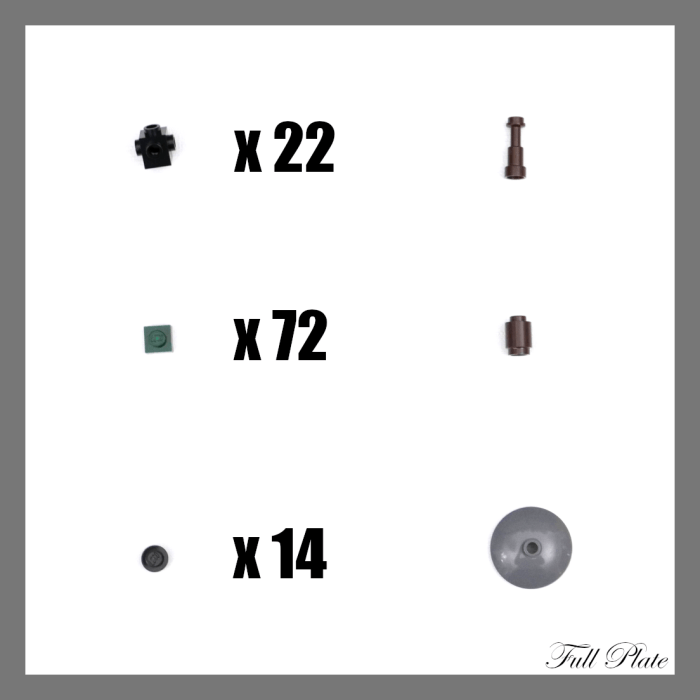
The parts on the right are just for the trunk, which you can (and should) consider using other parts for. The telescope trunk is actually a bit too thin for the scale of this tree, so something like round 1×1 bricks could be a better option. Depends on what you want to use it for 🙂
The colour of the travis bricks matter, as they will be seen in a few places. I’ve gone with black as it is quite close to dark green, but if you are going regular green perhaps consider using green travis bricks, even though they are more expensive. Or just get a few and use them in the places where they show and go with black ones where they are hidden.
The 1×1 round plates are just for offset and will not be seen in the build. So feel free to use whatever you have or that is cheap. Regular 1×1 plates works just as well.
Ok, let’s get building 🙂
First we just assemble the trunk to have something to put everything on. Assembling the canopy apart and then putting it on the trunk does not work so well.

For the first layer we’ll add two plates on each stud of the travis brick to get the canopy wide enough.
Next we’ll start on the actual leaves.

We’ll fill 2 travis bricks with 1×1 plates, except for one of the sides as shown on the left. We then attach one brick to the other as shown in the middle. Do note that the attached brick should be angled about 45 degrees and the empty stud should be pointing down.
We then attach this to one of the sides of the trunk base. The whole attachment should be angled slightly upwards, but you can just leave it straight and angle it later, because you will probably have to fiddle with it a bit once the other parts are on.

We repeat this step 3 more times to finish off the bottom layer.
We then add 2 plates in the center to have some offset to the top layer, which we’ll get started on next.

The leaves for the top layer is similar to the bottom layer, but we have 3 travis bricks instead of 2. One is covered with plates on all sides except two, the other two have two adjacent studs empty, and one of those should have one of its plates rotated about 45 degrees (the bottom one in the left picture).
Once we have these we start by connecting the two top pieces as shown the middle. We then also connect the bottom piece as shown on the right.
We need four of these constructions before we can move on and construct the top of our tree.

For the center of the top part we have another travis brick with one plate on each side.
The parts we built are each attached to one side as shown in the middle and the right.

We continue with part 3 and 4 in order to complete the top layer.
You will likely have to play around a bit with the angles to get it to look right. Don’t be afraid to have different angles on the different parts – this just helps to break up the symmetry and makes the tree look more organic. So try different things and see what you think looks good 🙂

We then attached to top part to the rest of the tree. It’s not too hard to see which angle it needs to be attached to in order to fit, but it’s roughly at a 45 degree angle from the bottom layer I believe.
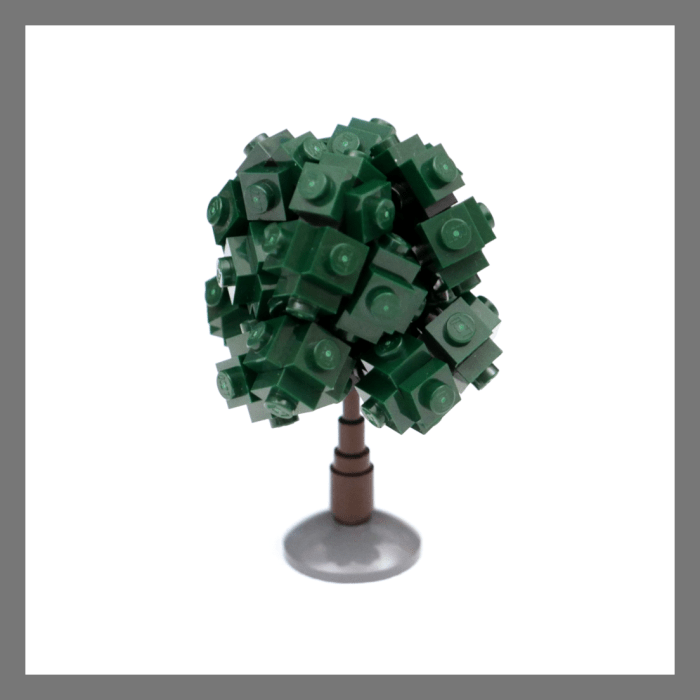
That’s it! The tree is done 🙂
You can of course go with other things than plates if you’d like. 1×1 tiles should work, but just be aware that the colour of the travis bricks will show through a bit more at the bottom of the tiles. If your travis brick colour matches the plates well you could even go for 1×1 round plates or similar. So experiment away! 🙂
Hope this was useful and happy building!


