
This is a tutorial covering the another of my grass techniques from my Element Experimentation series. This grass is shorter than the wavy grass and looks more like what you’d typically find on a soccer field, although it’s still quite hard to balance minifigures on it 🙂
The technique is based on two elements:
32828 – Bar 1L with 1 x 1 Round Plate with Hollow Stud
30126 – Minifig, Plume Feathers with Pin
We will need 2,5 of each of these per stud we’re trying to cover, so it’s quite bit intensive, but that is probably to be expected from grass techniques 🙂
In this tutorial we will be making a 4×4 square of grass to demonstrate the technique, but this can easily be expanded as large as you’d like, provided you have the pieces of course.
Here’s a list of what we’ll need.
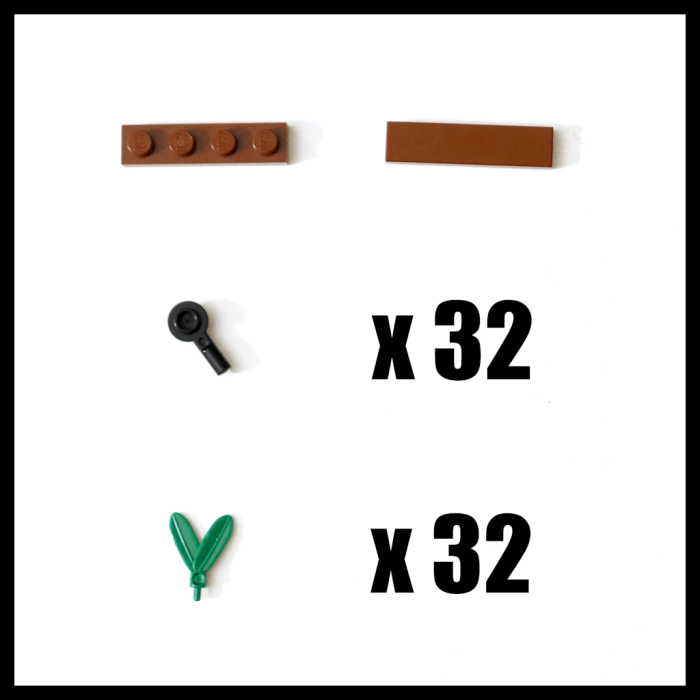
So apart from the main elements we just need something to hold it all together.
Let’s get building!

The end of the bar has one of those small pin holes that fit headgear attachments, and we’ll be inserting the plume there as shown above. We’ll then start stacking these on top of each other, but with a slight change in angle so that the each plume can fit, and so we get some width to the construct.

We continue this until we have a stack of eight, and we’ll then attach it to the 1×4 tile as shown. This completes the first row of grass. Now we just have to make 3 more 🙂

We keep on attaching the finished rows and once all 4 are attached we completed the build by attaching the 1×4 plate at the bottom.
And that’s it basically! 🙂
One thing to keep in mind when making the rows is to try to make each row fit in well with the rows beside it. So if one row sticks out a bit at one point try to make the other not stick out there so we’ll get a nice smooth lawn 🙂
Happy building!


