
This is the first tutorial out of two showcasing the techniques used to build my Slope Tree. In this we will cover how to make the trunk and then the tree foliage technique will be covered in the next tutorial. The two techniques can be used together or standalone, and either can easily be replaced with other techniques if so desired.
Before starting the tutorial, I just want to state that many of the concepts here are a bit hard to convey well in text, and if you find something hard to understand, just testing things out yourself will often clarify what works and what doesn’t. I’ve tried my best to explain what I mean and hopefully it is enough 🙂
That being said, let’s start with the trunk 🙂
The basic idea of the trunk is to have studs pointing in 8 directions, rather than just 4 which is the usual case with LEGO. This makes the design process a bit more complicated, but if executed well, the result can be quite impressive.
This tutorial has two parts to it.
In the first we will look at how to implement this 8 direction framework, how it works and how it can be used. We will look at a few examples of how different parts go together in order to enable you to use this to construct interesting and organic-looking trunks.
In the second we will go through, step-by-step, one particular example of a trunk design – namely the one used in the Slope Tree build.
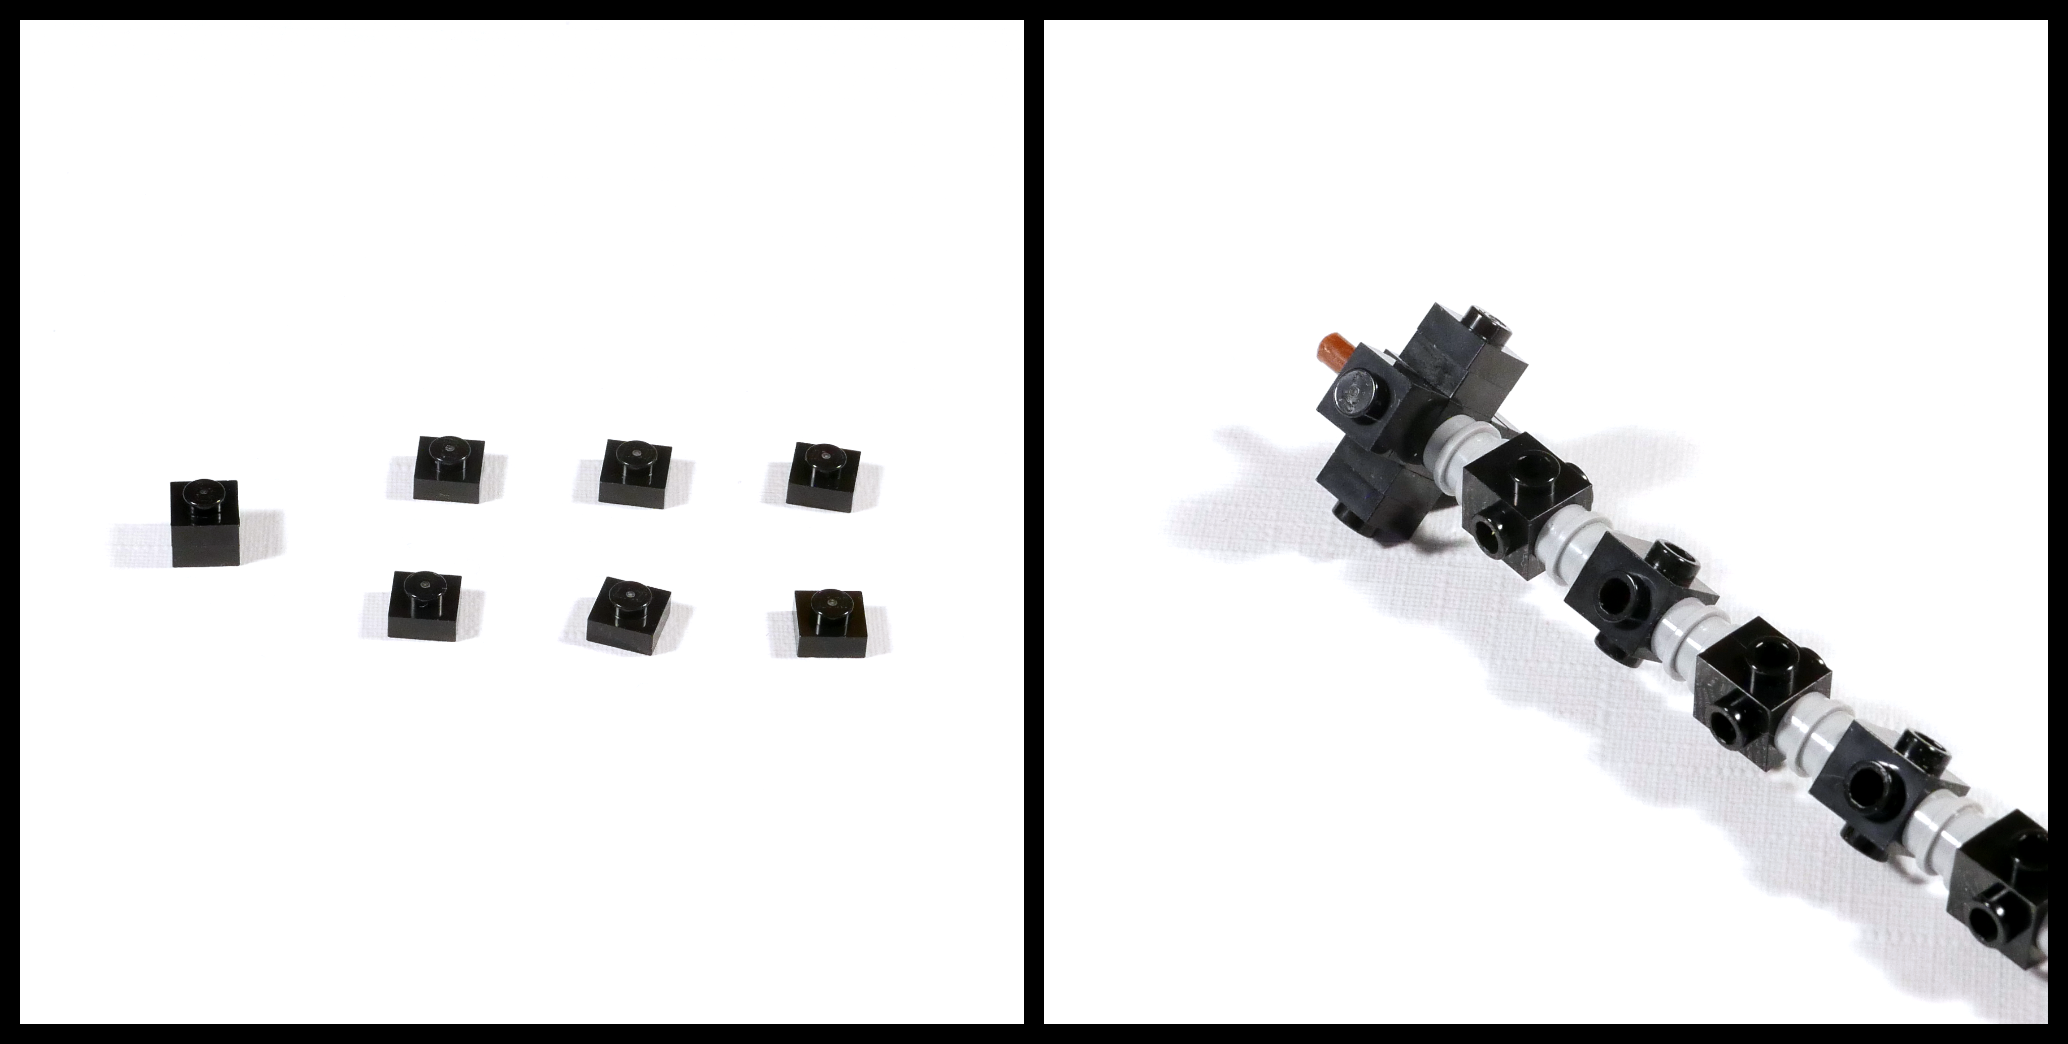
First, a list of the core parts of the trunk.

Though not strictly necessary, putting a hose through the center of the trunk is a very good idea as it helps to keep things together while still giving the trunk some flexibility. The trunk can be built without it, but it will be much more prone to breaking, especially if the foliage on top is heavy. So, if you have one of these hoses, then use it 🙂
We start by threading on travis bricks and plates on the hose. We put two round plates between each travis brick in order to get a 2 stud interval. We also rotate each travis brick 45 degrees from the previous one. This is how we end up with studs in 8 directions.

In the end it should look something like the above. You can, of course, extend or shorten it as you desire when using it to construct your own tree.
Also, I have left a short part of the hose sticking out on the bottom. This will be used as a means of fastening the trunk to the base, but you can also just connect it normally on a stud, in which case the hose should not be sticking out. Depends on what you prefer 🙂
We now have layers with studs in 4 different directions, with each layer rotating 45 degrees from the previous one. We want to be able to let the bark from one layer “bridge” over the next layer, to get the 8 direction trunk we are aiming for.
However, we need to pad the studs with plates, to avoid collision between pieces from the different layers.
We need to add a height of two plates on each stud. For the bottom layer we use 1×1 plates, and for the subsequent layers we use 1×2 plates as shown below.

We now have the basic inner structure for the trunk. Now we can add tiles with a width of 1 along each of the 8 directions. As we move on from here to see how this is best utilised we may in some cases need to remove one or two of the padding plates.
Before going further, I would like to clarify a couple of terms I’m using. When talking about vertical extension, I mean extensions running up and down the length of the trunk as the trunk would be if it was standing up. Conversely, horizontal extension refer to extensions around the circumference of the trunk. Just so that’s clear 🙂
First, we’ll look at the simplest example of bark – 1×4 tiles.
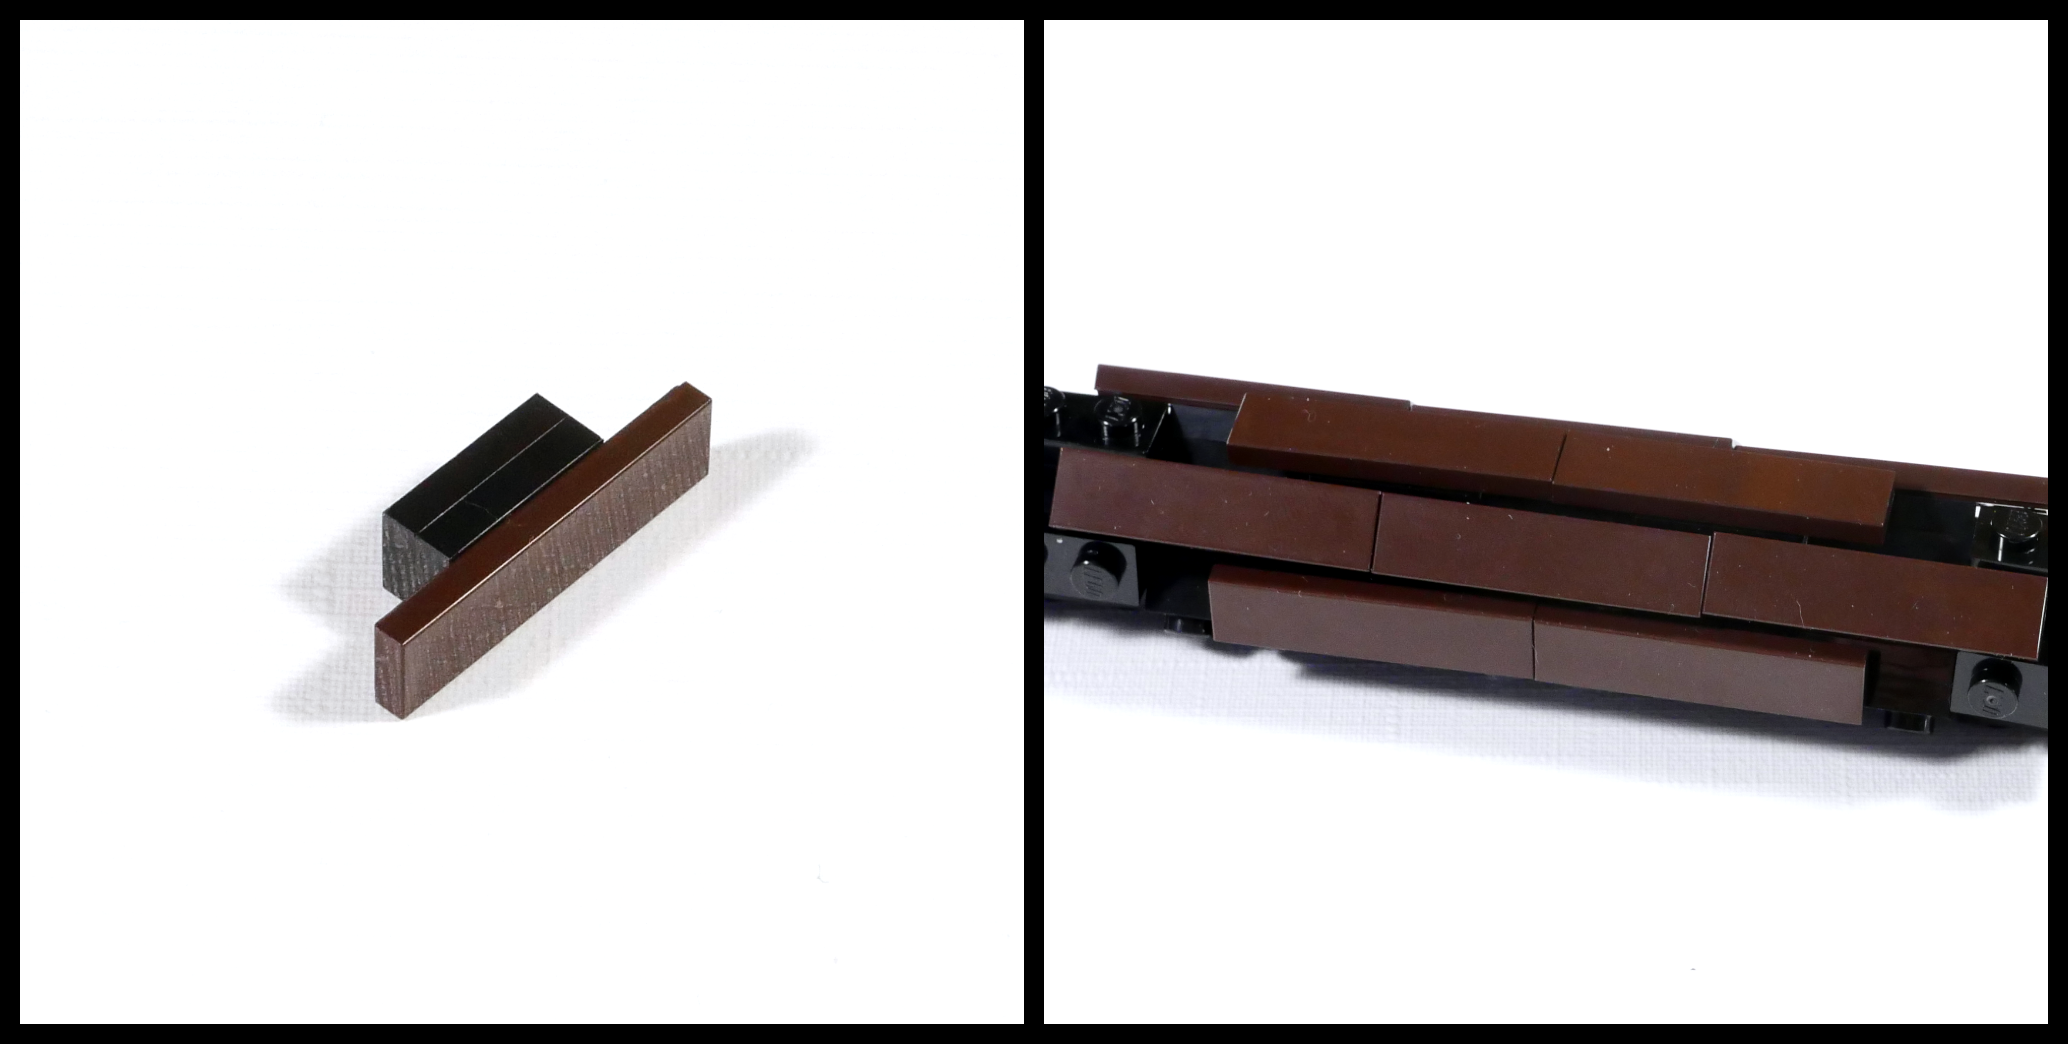
On the left this is shown together with the two padding plates, and on the right we can see the result of adding these to the trunk. It looks pretty plain and there is too much of a pattern to it for it to look natural, but it is a good starting point. When designing your own trunk this can be the default and then you modify parts as you see fit.
Modifications can be done in many different ways. One way is to modify how much the bark sticks out at certain point. We can make it either stick out more or stick out less.
Below is an example of making the bark stick out less.
Here we have removed one padding plate to give space for the rounded slopes, but note that the parts sticking out over the neighbouring layers are still at the height of 2 plates, in order to avoid collision. Adding a few of these to the trunk gives us slightly more variation, as seen in the right picture, but there is still lots more we can do.
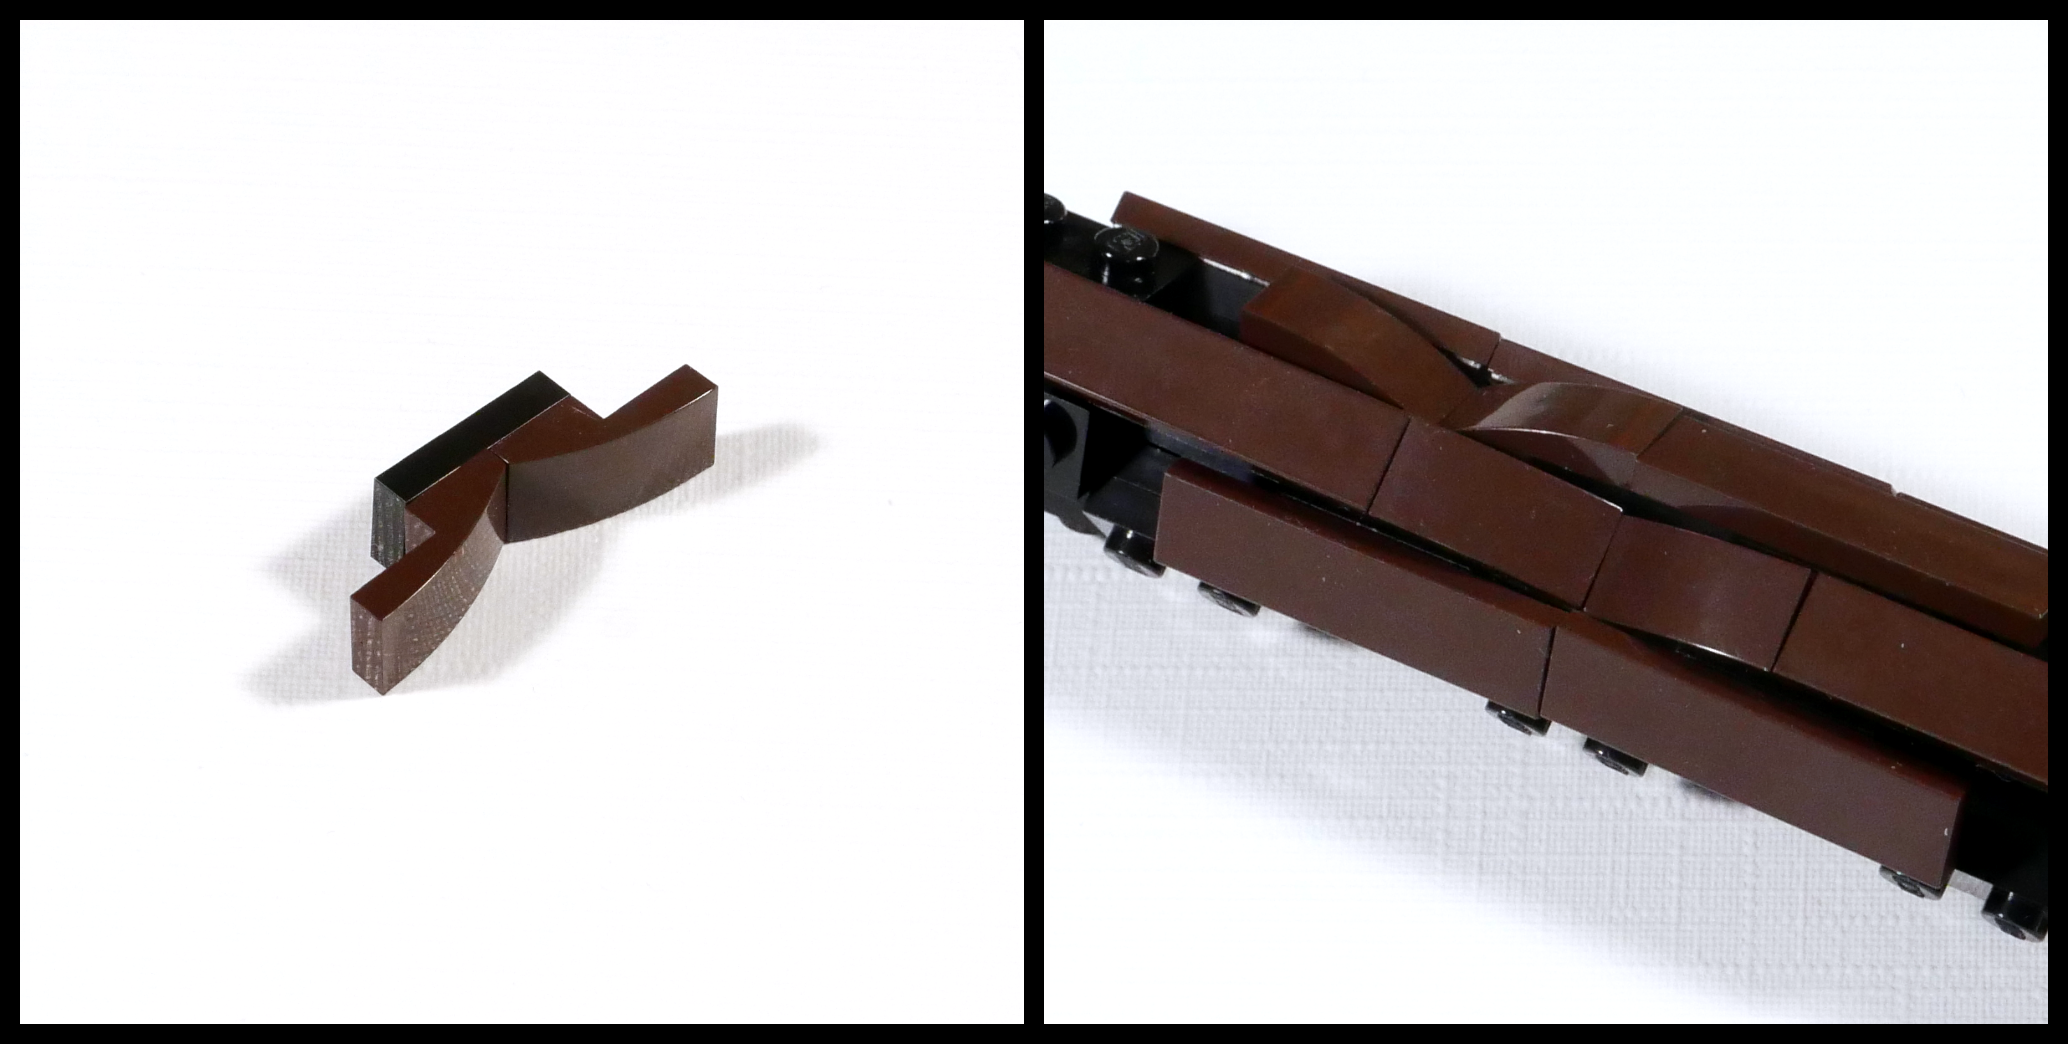
Another way to modify the bark is to change how far the pieces sticks out over the neighbouring layers. Now, if we make one side longer then the opposite side needs to be shortened in order to fit. So we have to adjust on both ends as shown below.
In this case we have also modified the height of the bark with slopes as mentioned in the previous step. In the end the best result is reached when we combine many modifications together, but in this section we’re trying to look at them more separately to gain an understanding for what can be done.

The result on the right is now even better. The bark is more dynamic and the changed length of certain pieces breaks the pattern. However there are long, uninterrupted lines running vertically along the trunk. We would like to break these up if possible.
We do this by letting the bark also extend sideways. This means that some parts will now be wider than just 1 stud, and this also means it encroaches on territory that the neighbouring layers would normally extend over. We have to account for this and shorten certain parts to make space for this. It can get a bit complicated, but once you start testing it out it will quickly become clear what works and what doesn’t 🙂

The example above is a very simple case of this, where we extend one stud in one direction, and we do the same all around the trunk on one layer. The result can be seen in the top layer of the trunk in the middle picture, but here we haven’t adjusted properly for it to fit in with the rest of the trunk. When going through the example trunk in the next part we’ll see many more advanced examples of this.
Looking at the center picture we see that the top layer now fully covers the circumference of the trunk. Why not just make layers like this all along the trunk? Yes, we could, but just like the first example where we only worked vertically, we also would get a rather boring looking trunk if we only worked horizontally.
The best result is reached when we vary the bark in all directions, horizontally, vertically and how far it sticks out. The right picture is an example of a piece that works in all directions, but the hard part is to design the pieces so they work well together and look natural. The best thing to do is to just try things out and we will get a better grasp of what fits and what looks good together.
For more inspiration of what can be done we will now go through the construction of a full trunk, layer by layer, to hopefully give some inspiration 🙂
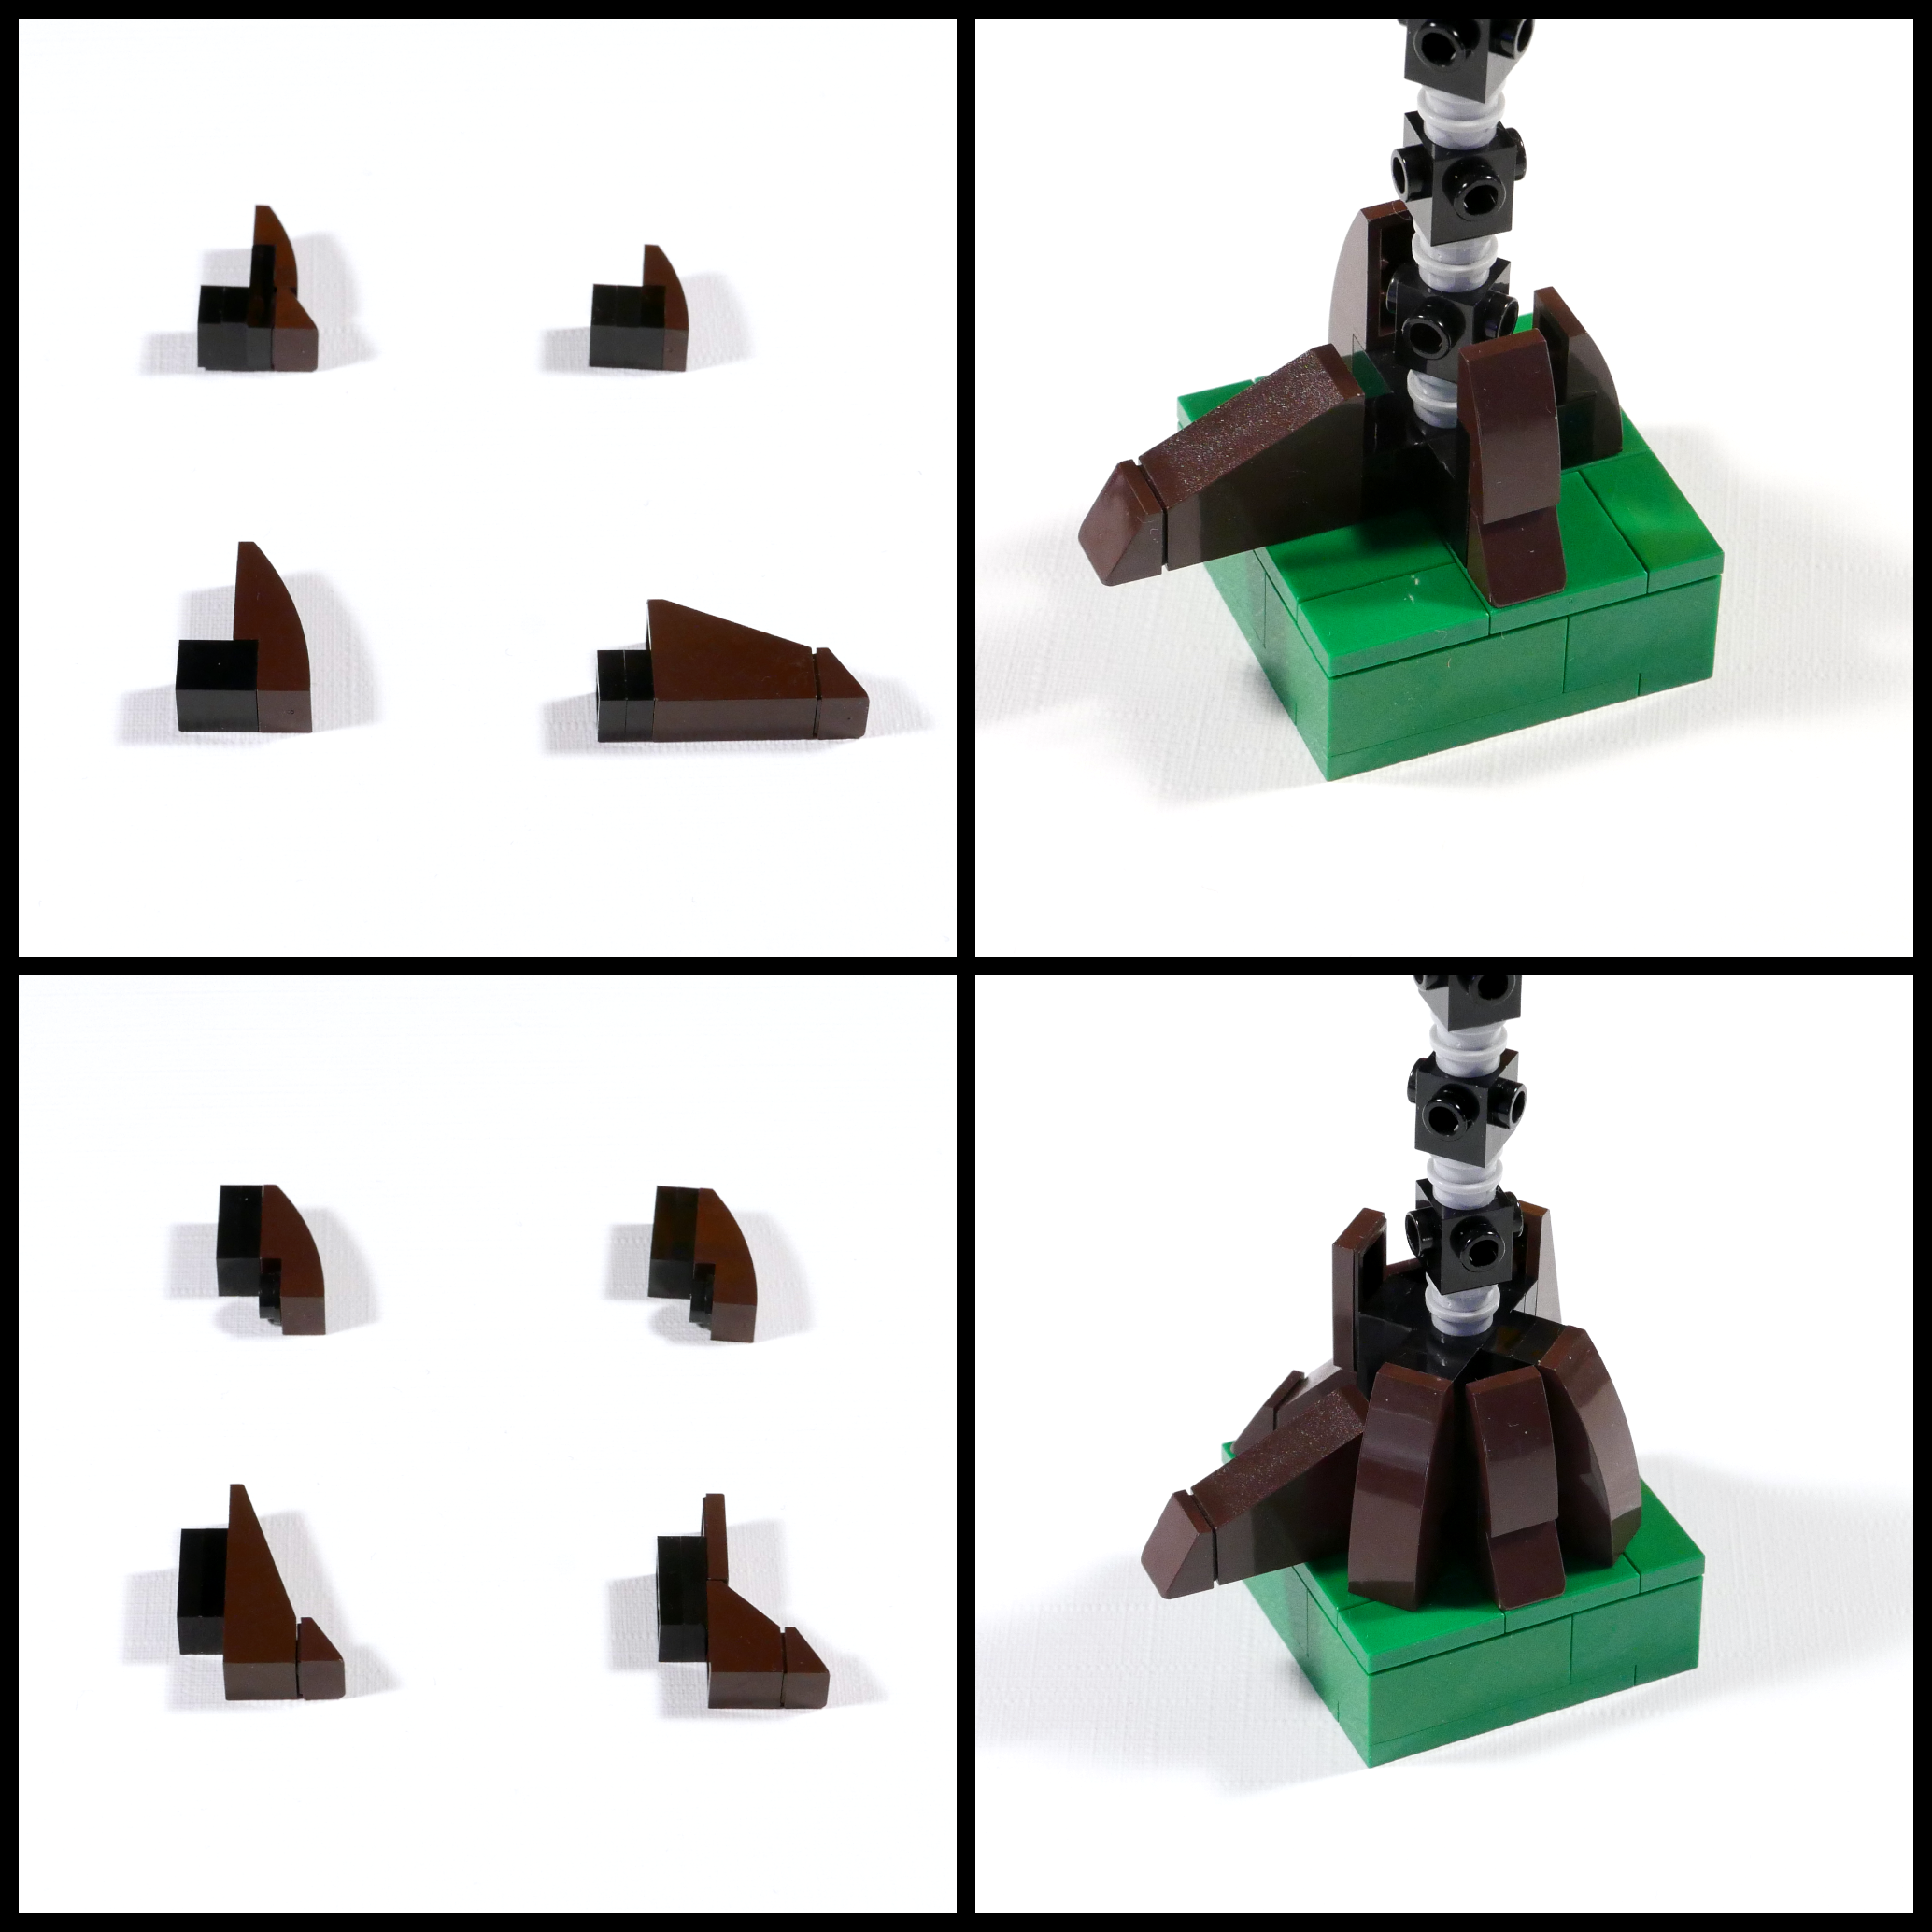
The first two layers will together make the bottom part of the trunk. As such we’d like it to stick out a bit to emulate the transition from trunk to root system. Slopes of different inclination works great here. These two layers mostly focuses on variation in how far the bark sticks out. There is no horizontal variation and only a bit of vertical variation as some pieces are a stud longer or shorter than the standard.

Now things are getting a bit more interesting 🙂
In the third layer we have two pieces that extend horizontally, in order to break the lines that were formed by the previous two layers. Do also note that these two extensions are made possible by the two pieces in the second layer that were shortened vertically. If not we’d have a collision on our hands 🙂
In the fourth layer we also have two pieces extending horizontally, one of them in both directions. We also have added something different, a 1×1 round brick which will later serve as a mid-trunk small branch.
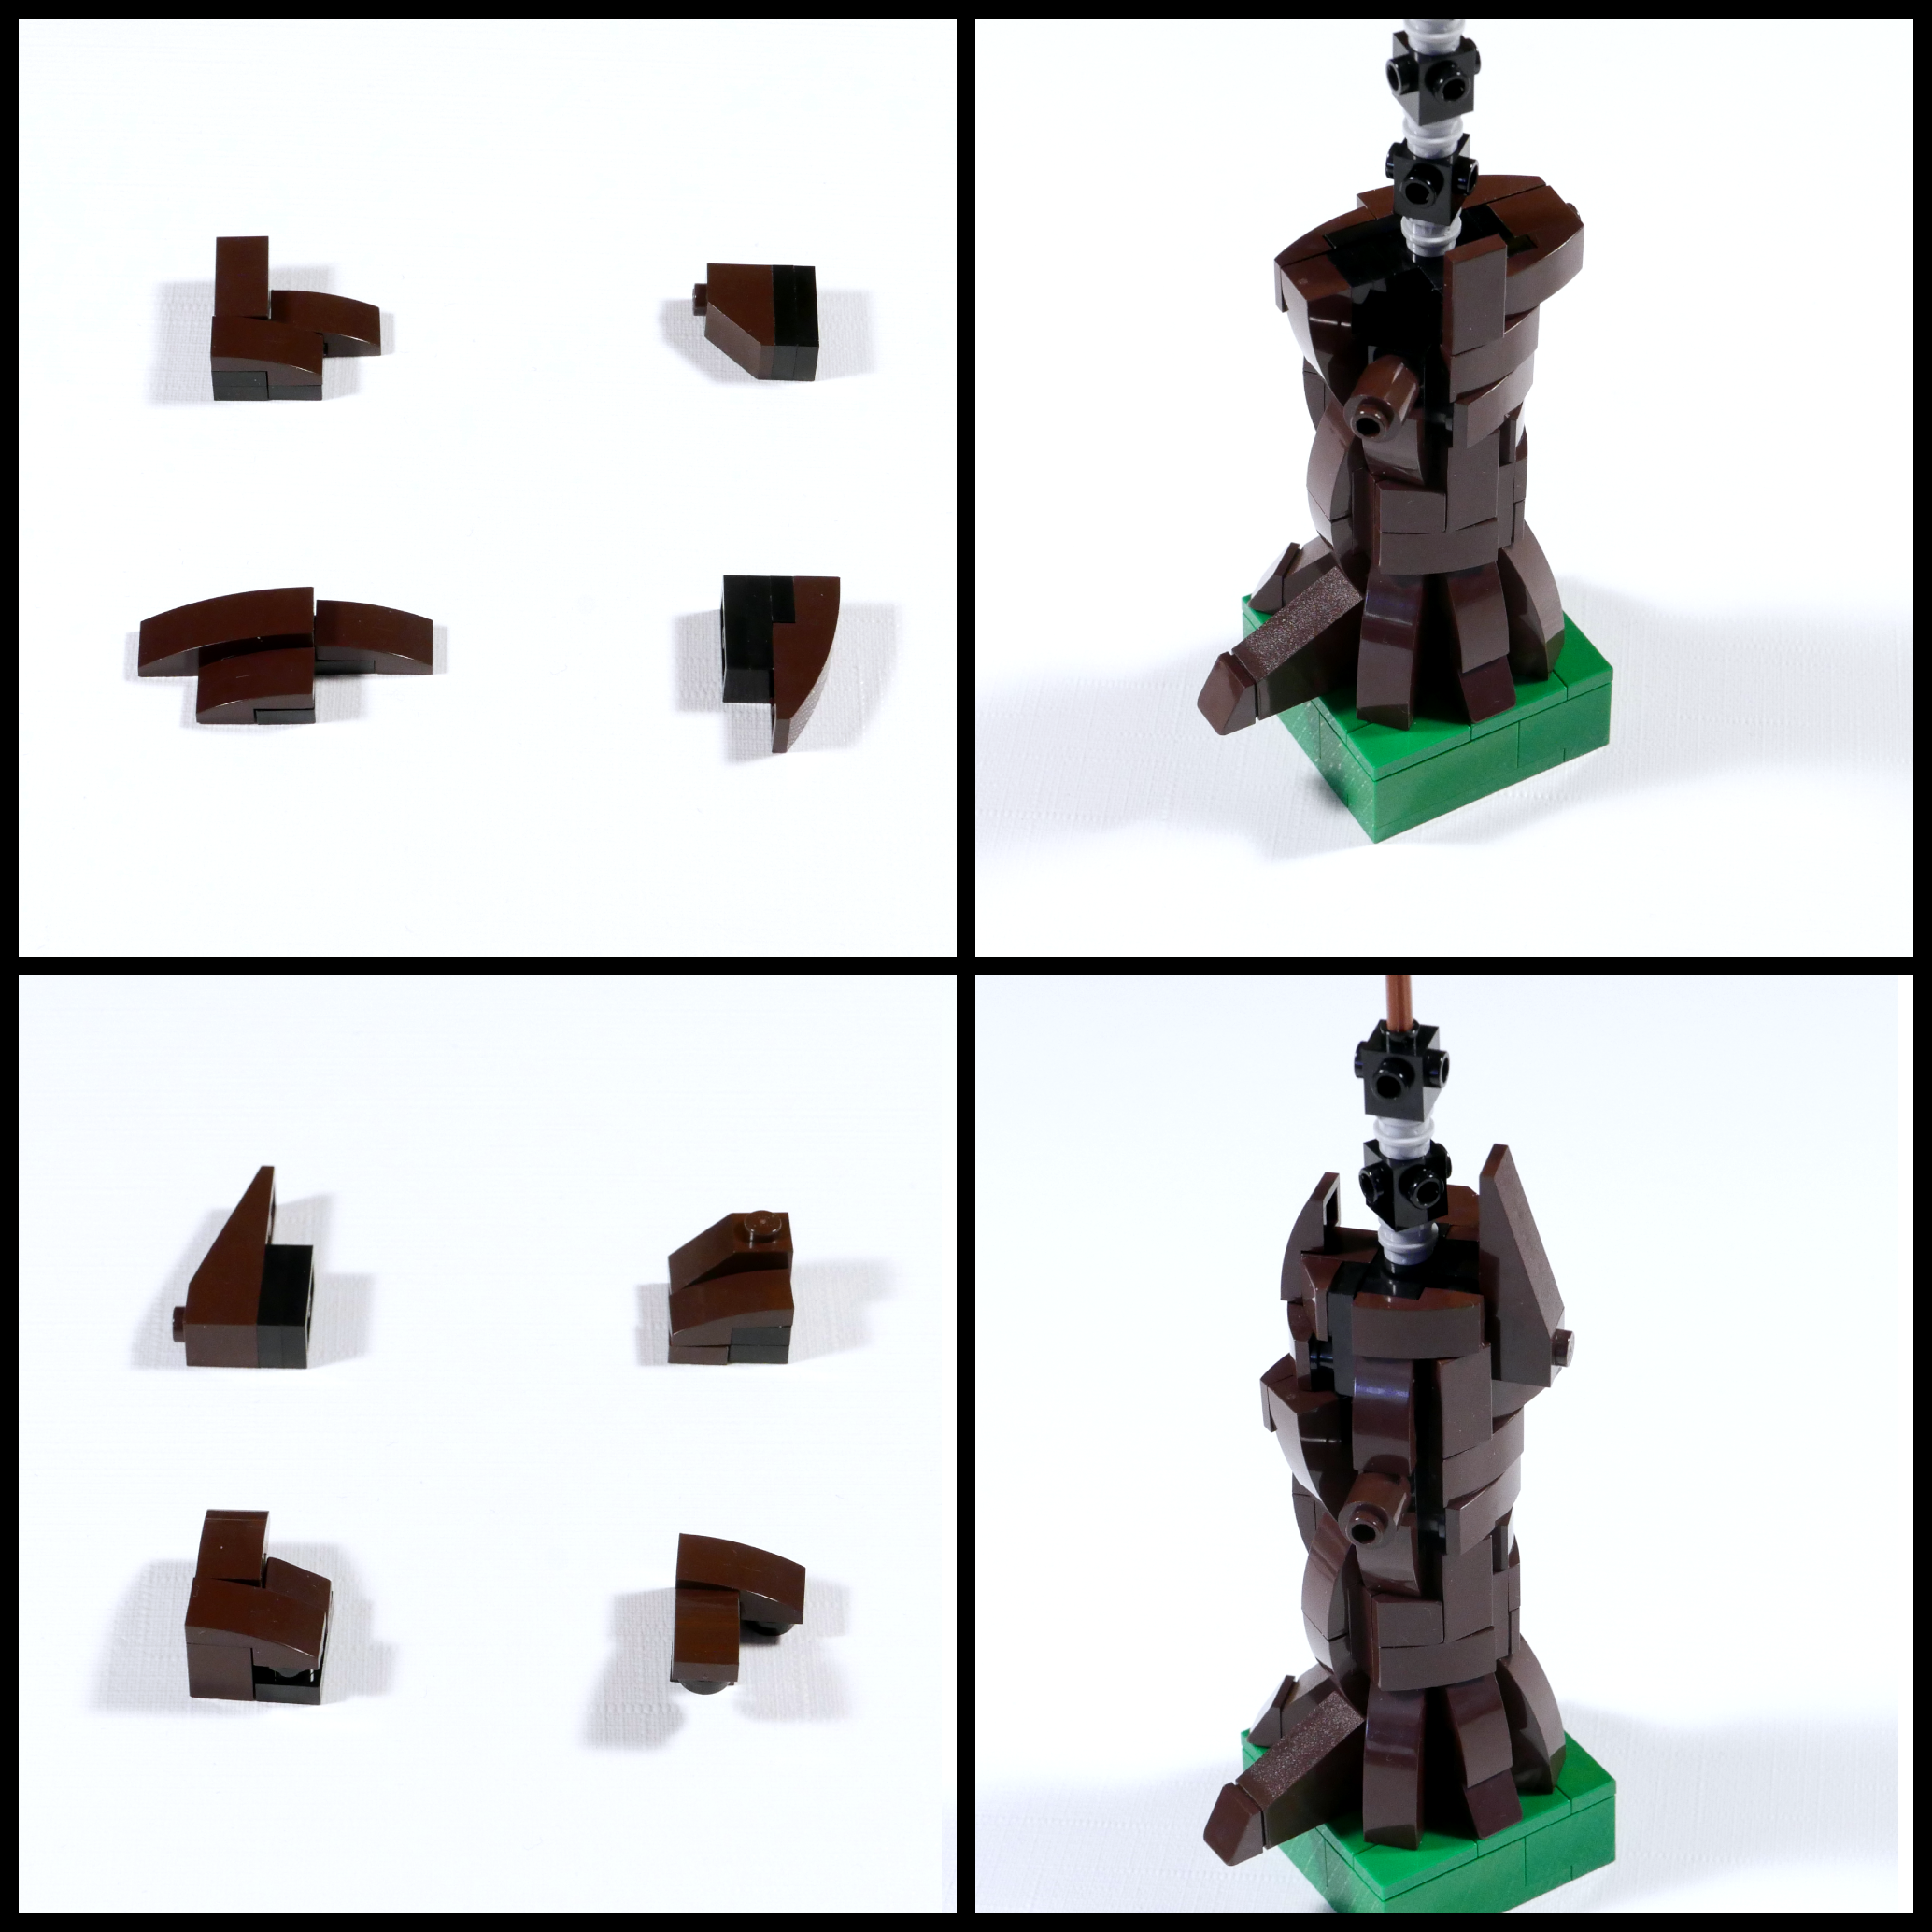
In the fifth layer we are going for a more oval shape of the trunk to have some more variation. To accomplish this we have two pieces that stick out quite a bit, put opposite each other. We then have to adjust the other two pieces to fit, which means extend them horizontally. The bottom left piece is quite extreme in that it extends two studs in both directions, but it works well 🙂
In the sixth layer there is a mix of horizontal and vertical extenstions again.
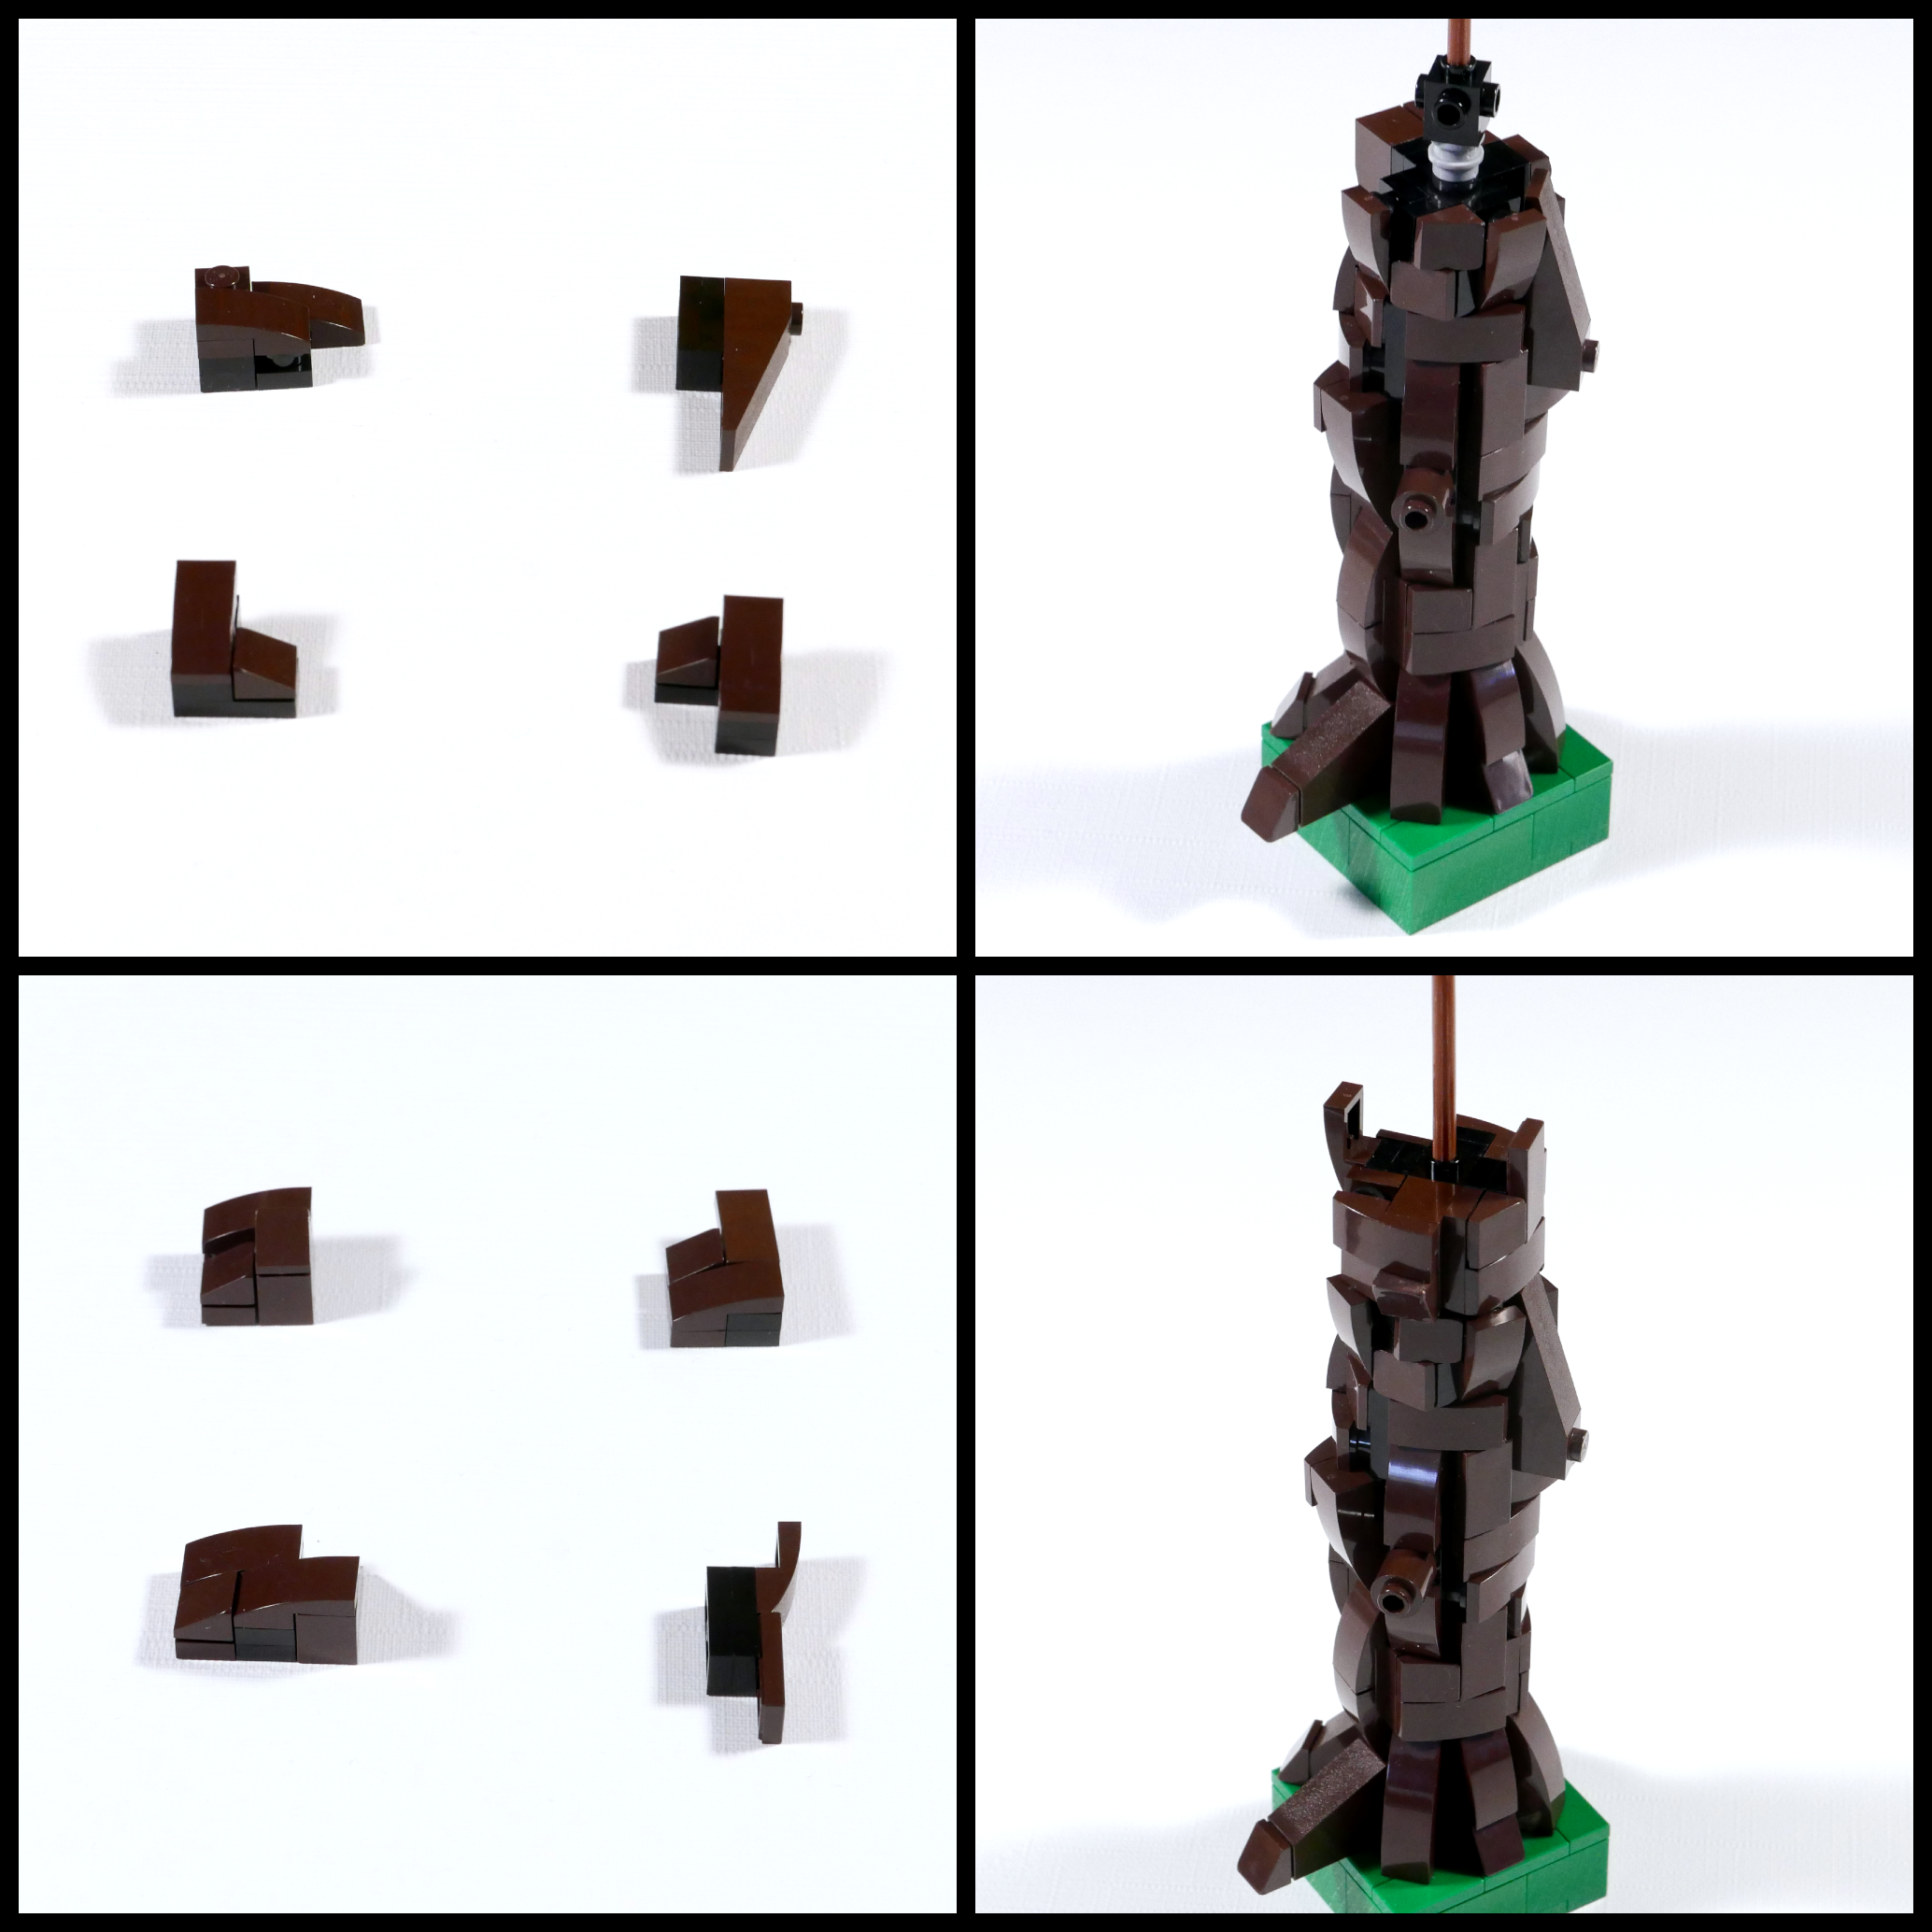
The last two layers are basically more of the same. A combination of variations in all different directions, making sure that everything fits and that we’re not leaving any parts uncovered.
Also note that we have let some studs uncovered along the trunk. This can be a fourth way to add variation with texture.
The trunk is now pretty much done 🙂
A note on colours. I have chosen to work with dark brown and black, as they are quite close to each other. Also, I work with the darker colour furthest in, to emulate shading in the deeper cracks. If you go reddish brown you could use dark brown as your darker shade, or just experiment with whatever you feel works 🙂
Here is the completed trunk with a nicer base 🙂 Plants around the bottom of the trunk can help by hiding some of the imperfections that are not easy to get rid of, plus they look nice 🙂

That’s it for the first tutorial! Hope you found it helpful 🙂
Happy building!


